Traveling is one of life’s greatest pleasures, allowing you to explore different cultures, indulge in foreign cuisines and take on new experiences. Stepping away from the familiar, and venturing into the unknown, has to be one of the best things about traveling.
And while travel is a great opportunity to disconnect from aspects of everyday life, in today’s interconnected world, staying connected while traveling has never been more important. Having a phone with data provides a range of benefits to both business and leisure travelers alike.
As people who love to explore the world, and have done so for work and leisure over the last 10 years, we know how important it is to stay connected while on the road. It’s not just about being able to share your amazing experiences with your loved ones back home (although that’s definitely a bonus!), but staying connected can also make your travels easier, safer, and more enjoyable.
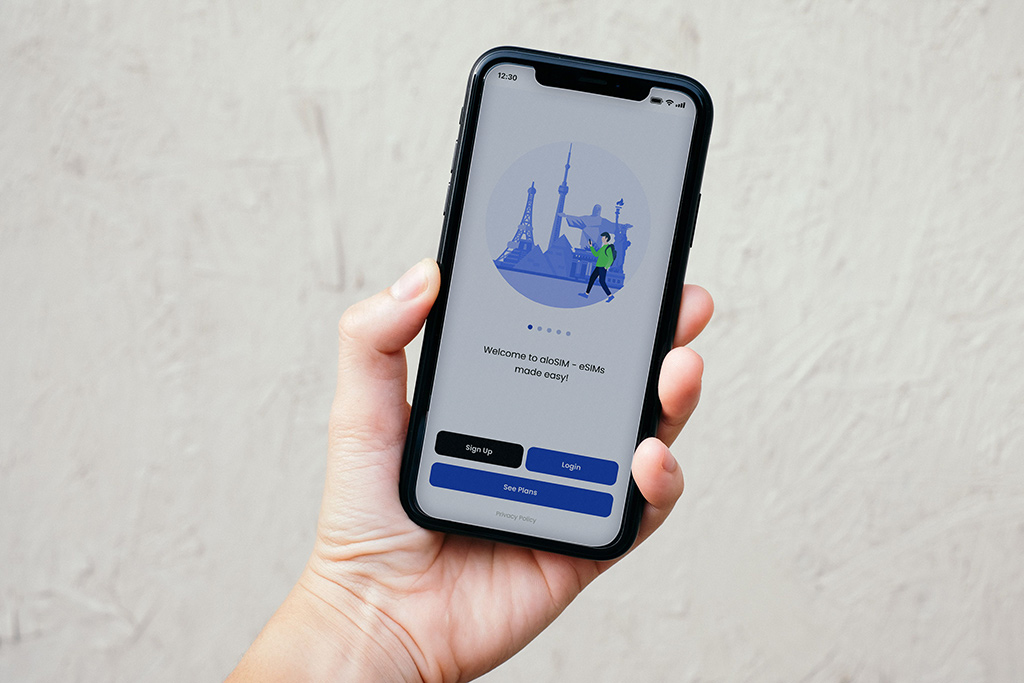
aloSIM is a telecommunications company that provides global mobile data solutions for travelers. The company was founded in 2016 with the goal of revolutionizing the mobile data industry by providing affordable and reliable data connectivity for travelers around the world. aloSIM offers a range of products and services, including SIM cards, mobile hotspots, and virtual SIM technology, which allow travelers to access high-speed internet and data services in over 200 countries.
One of the key features of aloSIM is its user-friendly interface, which makes it easy for travelers to purchase and activate data plans, manage their accounts and track their data usage in real-time. The company’s SIM cards and mobile hotspots are compatible with most devices, and offer fast and reliable internet speeds, ensuring that travelers can stay connected no matter where they are in the world.
aloSIM is committed to providing affordable data solutions for travelers, with competitive pricing and flexible data plans that can be customized to meet individual needs. The company also offers 24/7 customer support, ensuring that travelers can get the help they need at any time.
aloSIM is a cutting-edge telecommunications company that is dedicated to providing travelers with affordable, reliable, and user-friendly data solutions. Whether for business or leisure travel, aloSIM is a great option for anyone looking to stay connected while on the road.
Learn About Your Destination
One of the biggest benefits about being connected is that it allows you to access important information about the destination you’re visiting. From finding the best local spots for lunch, to authentic travel experiences and discovering hidden tourist attractions, having access to the internet while traveling can make a huge difference.
If you’re traveling to a destination with a foreign language you can utilize apps like Google Translate to help you break down any language barriers. Not only can you type in what you want to translate, but you can also take pictures of menus, signs, etc and translate them in real time.
Another useful app to have access to is Duolingo, or any other language learning platform, that can help you learn some local lingo while you’re traveling. While it might not be super essential to your travels, having a bit of local language goes a long way. You can connect deeper with the communities you’re visiting and learn a little more about them along the way.
Staying Connected to Loved Ones
Another benefit of staying connected while traveling is being able to stay in touch with loved ones back home. Whether it’s sending a quick message to let them know you arrived safely or sharing photos and updates from your travels, staying connected can help ease any worries and make you feel less homesick. This can help to ease any concerns or worries loved ones may have about your safety and well-being, and you can also maintain a sense of connection and closeness despite the distance.
Plus, it’s always fun to share your adventures with others and inspire them to plan their own trips! Social media might feel like a blackhole of comparison culture and time sucks at times, but there’s still a lot of good that it does in keeping people connected and building community. While you don’t need to document and share every waking minute of your trip, it can be fun to share your new adventures with people back home.
Staying Connected and Staying Safe
Staying connected can also help keep you safe while traveling. You can use your phone or other devices to check the weather forecast, travel alerts or safety warnings, monitor local news and events, and even call for emergency assistance if needed.
You can use messaging apps to communicate with other travelers or locals for tips and advice, which can be especially helpful if you’re traveling solo. You can also use apps like Google Maps to navigate unfamiliar streets and public transportation systems, which can save you time and help you avoid getting lost.
Stay Connected to Work (If Need Be)
Staying connected while traveling can also be extremely beneficial for business travelers. With the rise of remote work, many professionals are able to work from anywhere in the world as long as they have a reliable internet connection. This means that staying connected while on the road can allow you to keep up with important work emails, attend virtual meetings and complete important tasks, without having to sacrifice productivity or lose touch with your colleagues and clients.
Whether you’re traveling for adventure, relaxation, or cultural immersion, having access to the internet and staying in touch with loved ones can make your travels smoother, safer, and more enjoyable. So, don’t forget to pack your charger and stay connected on your next journey!
Content creators look out, there’s a new vlogging tripod on the loose with the sole purpose of helping you create the best, on-the-go videos you can. This multi-purpose tripod has a range of different uses to ensure you’re never caught out when you need to capture the perfect content.
Lightweight, versatile, strong and with more accessories than Inspector Gadget, the JOBY GorillaPod Mobile Rig is the perfect tripod to take on the road or use at home when you want to create content that stands out!
Best Vlogging Tripod for Phones
If you’re familiar with JOBY products you’ll also be familiar with the patented GorillaPod ball and socket design that has made their products some of the most versatile camera and phone tripods on the market. The flexible legs, along with rubberized grips, make the GorillaPod Mobile Rig accessible as a tripod or on the go selfie stick. If you can think it, the Mobile Rig can shoot it!
In this product review we jump into the nitty gritty of the GorillaPod Mobile Rig to really dissect what makes it such a great product. We’ll explore the build design, features and accessories to provide an overall review of the product.
Versatile Body
Weighing less than a pound (0.36kg), the JOBY GorillaPod Mobile Rig is small, lightweight and really easy to travel with. Despite its multiple arms and mounts it’s not a bulky tripod and won’t take up a lot of space in your luggage or day bag. Throw it in your backpack and always have it ready to rock when the moment calls.
When you do need to access it, snap the legs into place, position the arms and away you go. The strong GorillaPod ball and socket design is sturdy and strong enough to hold any phone, as well as the additional arm mount attachments, so you don’t have to worry about it tipping over when you’re in the middle of that perfect video or shot.
When you’re not using it as a traditional tripod, bend the arms inward like a handle and use the Mobile Rig like a selfie stick. The lightweight design means you can hold the phone out for that perfect selfie video without getting a sore arm or needing to find a place to rest the tripod.
Looking for the perfect camera equipment for traveling (as well as vlogging and blogging)? Check out our comprehensive Best Cameras for Travel Guide!
Landscape and Portrait Mode
One of my favorite features of the GorillaPod Mobile Rig is the ease that you can switch between landscape and portrait mode. Lots of other tripods, especially for phones, make you commit to one of the two orientations, but the Mobile Rig lets you easily adjust between the two.
A simple lock and release feature at the back lets you twist your phone between the two modes. This is all part of JOBY’s pro-grade, locking GripTight technology that ensures your phone is always safe and securely attached to the tripod. So if you’re rocking out a quick selfie or portrait vlog and then want to switch to a landscape shot, the GorillaPod Mobile Rig allows you to do it with ease, without having to untwist or unlock your phone.
Additional Arm Mounts
Another amazing feature of the GorillaPod Mobile Rig is the two, fully adjustable arms that are attached to the tripod. Each arm has a 1/4”-20 standard tripod mount on the end, which means you can add items to the tripod to help enhance your video. Whether it’s an external light or action cam to capture a different angle, or an external microphone, customize the GorillaPod arms with a flash shoe mount or GoPro mount to add extra devices.
As well as the arm mounts there’s also a cold shoe mount on top of the phone that could fit an external microphone, light or whatever else you want to add. This means you have three additional spots in total to rig out your mobile video content.
When you’re not using the additional arms you can even choose to unscrew them to further reduce the weight and bulk. The three legs are fixed, but you can can take off both arms or even just one arm if you’re not using it. There are literally dozens of different combinations that you can adjust to make this one of the most versatile tripod products.
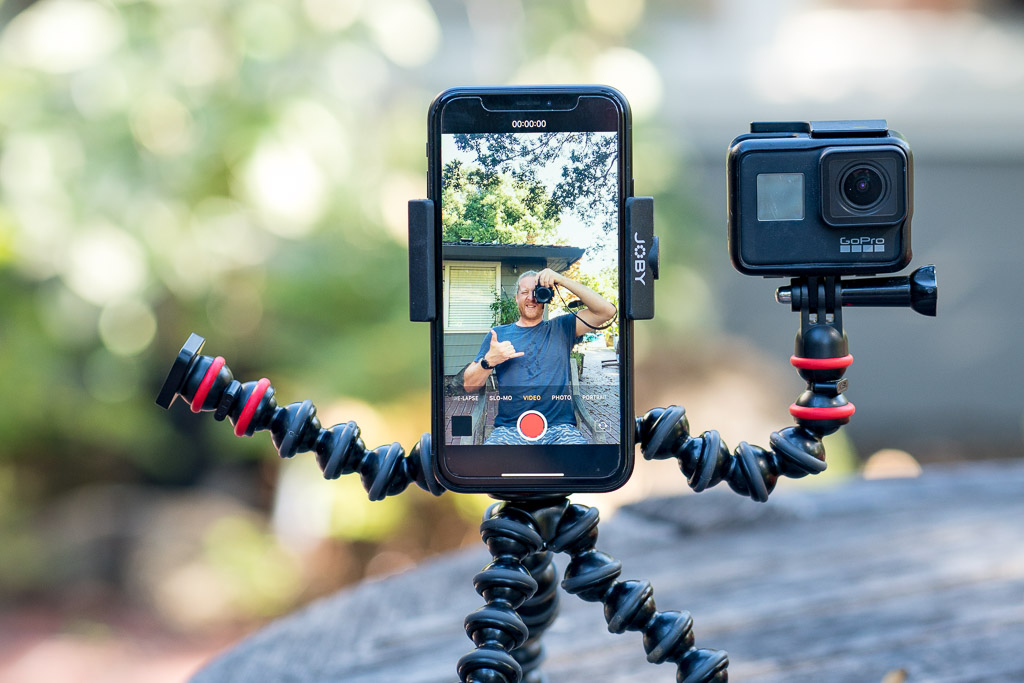
Field Tested
After giving the JOBY GorillaPod Mobile Rig a thorough once over we decided the best way to really test it was to get out there and start filming. We locked in the iPhone with a case without any worries, hooked up a GoPro and took off to give it a whirl.
Using the tripod in both stationary and selfie was a breeze. We switched between landscape and portrait modes quickly and efficiently and didn’t get tired holding it over the course of the day.
Everything that the GorillaPod Mobile Rig promised, it delivered. Along with mounting the tripod on flat surfaces we also locked onto a tree and uneven surfaces to really test it out. While the legs on it can’t hold a ton of weight when mounted sideways, they definitely have the capacity to be manipulated to mount the tripod in awkward angles that a regular, stiff tripod couldn’t work in.
Overall this is a fantastic product that costs under $100USD. If you’re serious about your vlogging and want to up the game, the JOBY GorillaPod Mobile Rig is the tripod for you!
These days everything is online. Whether you’re at work, traveling or make travel your work (like us) you’ve got to be online. And with our whole lives being online it’s only natural that we need an online filing cabinet to take with us (unless you feel like traveling with a backpack full of papers).
Whether it’s documents for work, travel photos and videos, college essays or just personal files, having cloud storage (your online filing cabinet) is the best way to keep track of all your files, as well as sending large files and sharing them with others. In fact, having access to a safe and secure cloud storage system is almost a necessity these days, as we need to store more and more data online.
As online content creators, not only do we have a personal need for online storage (file backs up), but with work we constantly need access to a service that allows us to share our work with clients and partners. Whether it’s sharing photos from a photo shoot or sending a video project for a tourism board, the ability to send large files is a must in our business.
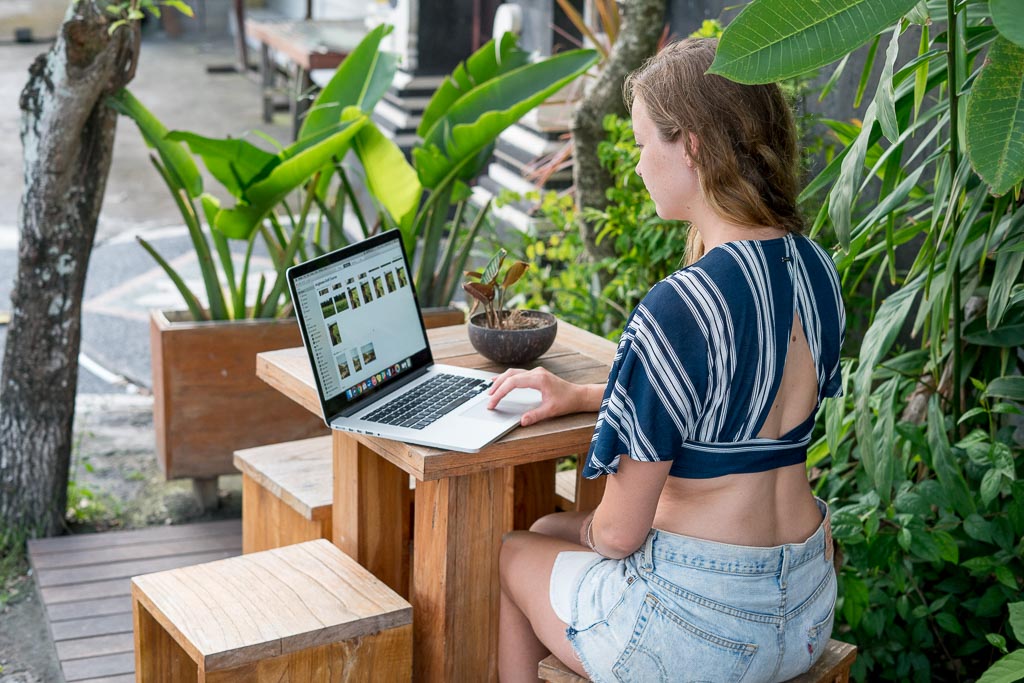
Cloud Storage for Remote Workers
This isn’t just the case for travel bloggers like us. With more and more people working online the need for a secure cloud storage system is more important than ever. You don’t have to be backpacking across the Philippines or taking a road trip in Nevada, you could just be working from your Hong Kong office or at a business meeting in London to need the services of safe and secure online cloud storage.
When you’re traveling, you have to expect the unexpected! Literally anything could happen to you or your work while you’re traveling, so backing up securely is a must! You don’t think it’s possible? Here is a random, yet possible scenario:
Your name is Steve. You’re a photographer on a nature assignment in Estonia. You spend the morning capturing the most stunning photos ever. You eat a peanut butter and jelly sandwich at lunch. You pick up your camera to see those epic morning pics and get jelly on your camera. You go to bed that night and don’t back up your photos and send them to your boss (or clean off the jelly)… BAM, a bear eats your camera!
Ok so that sounds dramatic, but I do know of plenty of real life stories from people who haven’t backed up their files, nor sent them to their clients, and lost all their work. And that sucks! Don’t be like Steve!
Best Way to Upload Big Files
As computers become more technical, camera megapixels grow and video resolution sky rockets, the problem with sending large files is amplified by the sheer size of the files. A RAW image from our Sony mirrorless camera is a whopping 42mb and a 2-3 minute video is in the gigabits! And it doesn’t just have to be media files, even PDFs are growing in size depending on how detailed and content rich they are.
When creating a simple business proposal, sending through graphic designs or Photoshop files, we’re talking serious file sizes these days! As the quality of our files grow, so does the size. Instead of talking about online storage in the gigabytes, terabits is now the household quota. Now here lies a huge problem. How do you share and send these massive files? With the measly 25mbGmail file attachment limit (10mb on Hotmail!!) it’s impossible to send them over email.
Enter Dropbox, our favorite cloud system for storing and sending files. Not only have we been using them for years to backup our travel photos, but they’ve been incredibly useful for sharing and sending large files to clients and partners. In fact just before I wrote this post I uploaded 40+ images to a shared folder for a client.
How to Share Large Files
Sending large files is as simple as uploading the file to your Dropbox account and then creating a shared link for a specific file or whole folder. Then you can take that link and share it with anyone. Shoot it across in an email, drop it in a WhatsApp chat or send it via carrier pigeon! Anyone with the link can access your file and you can choose how much access you want to give to them. And the best thing is they don’t even need a Dropbox account, although they definitely should get one!
Dropbox also allows you to set the boundaries when it comes to sharing your large files, so you can give people access to edit a folder or you can simply let them view and download it. If you’re working on a group project, it’s really easy to share editing access, so other people can upload files. You can also password protect the content to put it on lock down.
Transfer Large Files Online Through Multiple Platforms
Another great feature from Dropbox is the ability to send, receive and access your files across a range of different devices. Got an Android phone, a Windows work computer and a Mac at home? Not a problem (except for the fact that you’re making life really difficult for yourself!) Work between all devices and operating systems to view, edit and share your files. Download the phone or desktop app, or access via a browser. Everything is seamless.
With this much freedom and access to your files, it’s crazy to think that people out there are still like Steve, just waiting for their hard work to be eaten by a bear!
This is a sponsored post for Dropbox. All opinions are my own. Dropbox is not affiliated with nor endorses any other products or services mentioned.
The following post contains affiliate links. Clicking the links helps provide a small commission to us, at absolutely no extra cost to you! It’s a little way we keep our site running and would never recommend a product we didn’t personally use or wholeheartedly endorse.
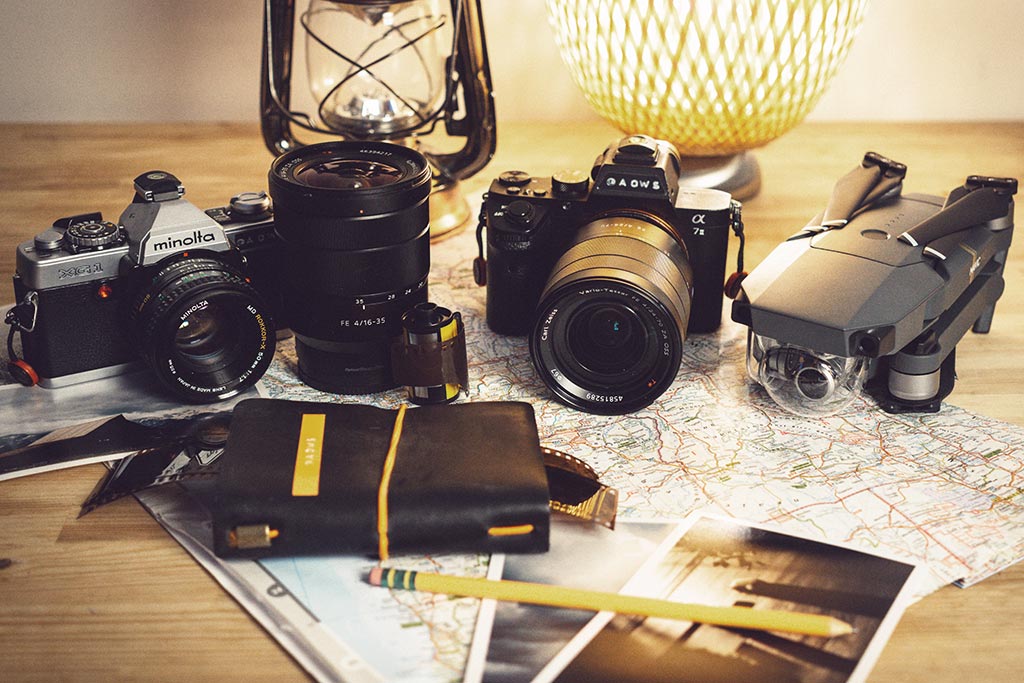
Over the last ten years we’ve probably gone through more cameras and photography equipment than the average traveler. Aside from being part of our job, we’re always testing out the best equipment to take on the road. From drones and hand held gimbals, to action cams and mirrorless cameras, we’ve tried it all!
In the following post we’ve compiled a list of our favorite and best cameras for travel, blogging and vlogging:
Best Mirrorless Cameras for Travel
The days of heavy, expensive DSLR cameras are gone, as more and more camera companies release their own versions of lighter and cheaper mirrorless cameras. With the same full-frame, interchangeable lens benefits of a DSLR, mirrorless cameras are changing the game for travel photographers. In the past we were big Nikon users, but have slowly been changing that out.
Sony has been a pioneer in the mirrorless camera field over the last 5 years, but Nikon, Olympus, Panasonic, Fujifilm and Canon have been leading the charge to keep up and surpass them. As more and more camera models come out, each bettering their previous model, it can be hard to know where to start.
Sony a7Rii
We first bought the Sony a7Rii back in early 2016. We’d just finished filming our Travel Channel tv show pilot and had a bit of extra money floating around, so we decided to reinvest it back into our business. It was the first full frame camera we’d ever purchased and we went big! Looking back now it was probably one of the best investments we’ve made for our blog. Spending almost $5000USD for the body and a couple of lens we suddenly took our photography game to a new level.
But it wasn’t just the camera that made us better photographers, it was also the time we spent learning how to use the camera. We went beyond understanding how to shoot on manual and took advantage of the amazing features this camera had to offer. Shooting at a ridiculous 42.4-megapixel, the Sony a7R series is the perfect camera for travel photographers looking to step up their skills. Built in image stabilization, fast auto focus, dynamic range and so much more!
Still learning how to use your camera? Get2 FREE months on Skillshare for access to amazing tutorials and classes on photography, photo editing and more!
While the Sony a7Rii might have been released in 2015, it’s still an incredible camera. As it’s an older model, the price to purchase this camera is now really reasonable if you want to improve your photography. Granted, if you’re not already shooting with Sony, you’ll need to update your lens as well, but it’s a worthy investment. The newer Sony a7Riii model offers a few slight improvements, but nothing $1000USD is worth in our opinion.
The Sony a6000 has been a favorite camera of ours for a long time. We’ve loved this camera so much that we purchased three of them, but not all at the same time. Long story short, when they go missing on your travels, it’s always good to havetravel insurance to ensure you can replace them! Christine first purchased this camera back in 2014 when we started to switch our gear over to Sony and embrace the benefits of mirrorless cameras.
Three cameras and five years later we’re still recommending this as a fantastic camera to take on your travels. It’s an APS-C crop sensor, so it doesn’t have the same photography capabilities as the Sony a7 / a9 series, but for a quick, sharp and light travel companion it can’y be beat. And at its current price point of $600ish dollars with a lens it’s amazing value for what you get.
Since the Sony a6000 was released there have been some big developments with the a6300 and a6500, but the price starts to climb as you look at each model. For the time being if you’re looking for an easy camera to take on your travels then you can’t go past the a6000 or a6300.
The last five years have seen a huge shift in the commercial and recreational drone space. Tech giants like DJI have paved the way for all levels and abilities and have well and truly earned their spot at the top. Not only do they make the best products, but they’re pioneering changes and advancements at a rapid rate.
When it comes to buying a drone for travel there are two main factors to consider, size and quality. Like a lot of camera equipment, the bigger it is, usually the more functionality and quality they’re going to have packed into it. So choosing a drone comes down to three choices based off size: the Phantom, the Mavic and the Spark.
DJI Phantom 4
This was the first drone version we bought back in late 2015, a DJI Phantom Pro 3. Since that time the Phantom has seen some incredible developments in picture quality, sensors and battery life. The Phantom is the bulkiest of the three options, but it also has the best stability in the air. Because of its larger propellers, motor size and body design it is less affected by wind and hovers better in the air. The newer Phantoms also have an enhanced camera sensor, which means they take a clearer and more detailed picture.
We traveled all around the world with our DJI Phantom drone and it served us well throughout the US, Mexico, Colombia, around Europe and back in Australia. The only downfall when traveling with a Phantom drone is the size. I had to have a dedicated backpack carry on just for the drone and remote.
Technical Stuff
One inch 20-megapixel camera sensor
Captures RAW and JPEG images
Shoots 4K at 60fps up to 100mbps bitrate
Dual rear vision sensors and infrared sensing system for obstacle avoidance
The next generation of drones from DJI really changed the game. Introduce the Mavic, a drone that had foldable arms and took up less than half the size of the Phantom. Plus the remote was also half the size, making the DJI Mavic every travelers ultimate companion. Over the last couple of years the Mavic has seen huge improvements to its design and capabilities, but not its size.
The latest Mavic 2 Pro has a whopping 20-megapixel one inch CMOS sensor, as well as an adjustable aperture and the ability to shoot 10-bit HDR video. Ok, that all sounds a little bit technical, but just know this, it’s a darn good camera strapped to this tiny foldable drone.
After lugging our Phantom around for a couple of years we decided to upgrade to the Mavic Pro at the end of 2017. We’ve since taken it all over the United States, Australia, Guyana, Mexico and Southeast Asia. In the same drone bag that used to be dedicated to carrying just the Phantom and remote, now fits the Mavic Pro, remote and all our DSLR camera equipment. We’ve essentially quartered the amount of space that the DJI Phantom took up.
Quality wise the Mavic has been great. In very windy days, or when you’re really making it work, the Mavic doesn’t quite hold up as well as the Phantom, but at the expense of its compatibility it can not be beaten as the best drone to travel with.
Technical Stuff
One inch 20-megapixel CMOS camera sensor Hasselblad camera
The newest addition to the DJI drone family is the tiny DJI Spark. This drone, with it’s much cheaper price point and ease of use, is definitely marketed at entry level drone users and photography enthusiasts. It has all the signature DJI technologies, but in a much smaller version. So small you could even fit it into your jacket pocket, but with that extreme reduction in size comes some loss in functionality.
While you may benefit from being able to literally carry the DJI Spark around in your pocket, you do get some limitations compared to the more powerful models in the Phantom and Mavic. The DJI Spark has a much shorter battery life and transmission range, as well as a limited gimbal and image quality. That being said, the DJI Spark is a great, easy to learn drone to take on your travels.
From all reports the DJI Spark is a great addition to any travelers looking to buy a compatible travel drone, but, if you were looking for anything serious in regards to quality, it’s probably not the best choice. Because of the lightweight design the DJI Spark doesn’t have as good stability and is tougher to maneuver in the wind.
Technical Stuff
16min flight time
1.2 mile (2km) transmission range
2-Axis gimbal (means less stability on the camera)
For us the DJI Mavic wins this race! If Goldie Locks was deciding between drones, this one would be ‘just right!’ It’s the perfect combination of quality image, stabilization, size and price. If you’re looking to travel with a drone, the DJI Mavic is the best choice.
Best Action Cameras for Travel
Enter into the world of high paced, adrenaline junkie status with an action camera for travel. Take your shots to the highest highs and deepest depths with a durable camera that was meant to be a little rough around the edges.
While not completely necessary for everyone, traveling with an action camera gives you a lot more versatility when it comes to quick, on the go shots that involve water or heights. Strap a GoPro to your motorbike as you zoom around the Philippines or when you’re diving under waterfalls in Lombok, Indonesia.
GoPro
GoPro is a tried and tested, well known household brand in the action camera department. While they’ve had their crack at other aspects (R.I.P Karma drone), action cameras are where they really shine. And so they should, they’re the original creator of a rugged camera that could really push the boundaries.
We’ve been using GoPro cameras since 2013 when we had our first GoPro HERO2. We also had a HERO4, HERO5 Black and now have the HERO7 Black. Each new release has proved itself a worthy upgrade, as the GoPro cameras have improved their waterproof housing, camera quality, high-definition recording and image stabilization.
With the new HyperSmooth, this makes the HERO7 GoPro’s best camera yet! The image stabilization is unbelievable! I took this camera on my trips adventuring around Guyana, from ATVs and 4x4s to kayaking and horse riding, and the smooth video recording without a gimbal was incredible!
Move over GoPro, there’s another contender in town. Mid-2019 DJI announced to the world that that is was entering into the action camera arena and it did so with a bang! The DJI Osmo Action might look pretty similar to the GoPro HERO range, and that’s because it is. It’s got a watertight body, it’s own ‘RockSteady’ image stabilization system and shoots 4K at 60fps.
There is one key thing that sets it apart from the GoPro HERO, and that’s the frontward facing camera. Gone are the days of wondering whether you’re in the GoPro shot when taking a selfie, now the DJI Osmo Action offers a small screen at the front, so you can watch yourself in selfie mode. It sounds like a minor change, but it’s a game changer for action cameras!
Aside from that it levels up against the GoPro HERO7 pretty evenly in other technical specifications, but is also around $50USD cheaper depending on the marketplace you purchase it from. It’s a solid purchase and it’ll be an interesting battle to watch GoPro and DJI battle it out over the next couple of years.
Hold onto your hats, because the action camera space just got a new competitor! And here’s the first amazing thing to say about the AKASO V50 Elite, it’s less than half the price point of a GoPro or Osmo and just as good! Whether you’re a professional content creator, a hobby photographer or just someone who wants to document their trip, the AKASO V50 Elite jumps onto the scene with a bang. Containing all the same great features as the more well known brands, the AKASO V50 Elite offers 4K recording at 30fps and 60fps, quality image stabilization, touch screen, voice control and a super wide field of view.
The only difference between this device and the almost three times as expensive competitors is that it doesn’t have an in-body waterproof housing. So if you’re going to take it underwater you need the waterproof casing, which comes included. This means you lose the ability to use the touch screen under water and have to use the buttons, but it’s a small price to pay for the huge saving you get on this action camera.
In regards to quality the AKASO V50 Elite is just as competitive as the other cameras, especially for the unbelievable price! The 4K offers sharp quality video and with a bit of editing comes up sharp and professional. For anyone looking for great action camera on a budget, this is the one to pick!
Best Camera Tripods for Travel (Photo and Vlogging)
Whether you’re capturing epic long exposures our capturing a quick self on the go, a handy tripod is a must for any traveling photography enthusiast. From handheld and bendable tripods like a GorillaPod to more traditional, fixed tripods, here is the list for the best camera tripods for travel.
JOBY GorillaPod Mobile Rig
JOBY are the best in the business when it comes to tripods; providing easy to use and durable tools that make it simple to enter into the vlogging world. The GorillaPod Mobile Rig is a real game changer for phone or action camera recording, giving you access to multiple arms and mounts to rig up lights, camera and action!
With the trademark JOBY three prong, flexible wrapping legs you can set up the Mobile Rig just about anywhere. Set it up on the table, hang it from a tree or simply hold it in your hand. Or as JOBY like to say, Grip It, Wrap It, Stand It. The multiple mounts means you can have your phone set up (in landscape or portrait), as well as a secondary camera in the GoPro or lights. The GripTight camera mount has a secure locking mode that makes it easy to switch between viewing modes. The multiple mounts give you freedom and flexibility to add extra elements to your video, like lighting, a secondary camera and enhance audio. Whether we’re shooting from the road, or setting up an Instagram Live at home, this is our go to vlogging tripod!
Technical Stuff
Secure any smartphone in the GripTight mount
180-degree adjustable tilt for portrait and landscape mode
While the GorillaPod Mobile Rig is the perfect on the go tripod for a phone and action camera, when we need a little more lift we use our trusty GorillaPod 3K. As the name states, this blogging tripod can hold up to 3kg (6.6lgs) of weight, which makes it perfect for our heavier Sony camera.
With its trademark JOBY wrapping legs the GorrilaPod 3K is flexible and adaptable to any setting. It’s lightweight, sturdy and really easy to set up. We particular like the quick release attachment that makes it easy to set the camera up on the tripod or release it quick for handheld action. The GorillaPod 3K also makes it easy to vlog with when cruising around the streets.
This compact travel tripod is for those more stable shots when you want to control the height of your tripod and do longer exposures. The GorrilaPod tripods are great for on the go, but if you’re doing any kind of still work with a low aperture, then you’re going to need a really study tripod. We love our MeFOTO GlobeTrotter because its compact, lightweight and perfect for holding up our heavy DSLR and lens. It also comes in a range of colors to suit your style and environment.
Imagine this… you’ve just been on the most amazing trip and taken some incredible pictures. You’ve documented all your travels, everything from the delicious meals and local architecture, to daily adventures and fun nights out. You can’t wait to get home and upload them, only to realize that your memory card has been corrupted and you’ve lost EVERY. SINGLE. PHOTO!
You would think the chances of this are pretty slim, but after more than ten years of travel you’d be surprised how many times I’ve heard this happen to people I know. From first time travelers to seasoned veterans, the curse of the lost photos can strike anyone when you least expect it.
But don’t panic just yet! The following article outlines a disaster proof plan to combat the potential loss of your travel memories. It starts with backing up your photos onto the Cloud, ensuring you’ve got that extra security built in via Dropbox’s file recovery service. Next you backup your photos on an external hard drive, where you’ll have ready-to-go access for those times without Internet.
Backing Up Photos on the Cloud
The Cloud, a commonly referred to term that confuses the majority of people over 55 years of age (specifically my Dad). Using cloud based services has become synonymous with the Internet these days, with file storage as the main way that people are taking advantage of this fictional cloud in the sky.
The Cloud is simply an easy way to say that your data (in this case photos) is being sent up to a satellite via the Internet, and then it’s being pinged back down to a data center somewhere in the middle of nowhere. From there it stays safely tucked away on a hard drive as big as a factory, where you can remotely access it whenever you have an Internet connection.
Think of your travel photos as little travelers themselves. When you send them off to the ‘Cloud’ they get on an invisible rocket up into the clouds, then descend into the Data Center Inn and stay there until you need them to come back.
Over the last decade online file storage has seen massive improvements. From the amount of space each user has access to, as well as the price it costs if they want to expand their amount of storage. Not only that, but there have been some really useful features built into the services. Dropbox, one of the most established and most trusted services, continues to add more features that help you recover lost files, as well as see the history of changes made to files.
We’ve personally been using Dropbox for the last five years and love it. We’ve found it intuitive and easy to learn. You can organize your files into folders, easily search for specific files and share access to files for people outside your account. And by far one of the greatest features is the file recovery option.
File Recovery of Travel Photos
The file recovery feature of Dropbox lets you reverse the accidental finger slip that saw you delete your whole folder of Lisbon Pics 2019, when all you wanted to do was delete that one embarrassing picture of you vomiting in the street after consuming a dozen Pastel de Natas. With a simple click of a button you can reverse the deleted action quicker than it took you to down a liter of Sangria.
In fact, say you didn’t realize what you had done straight away (probably the Sangria), you’ve still got up to 30 days to go back to recover your files. If you’re on a Professional or Business account you’ve got more time for the trip hangover to wear off, with even more time to rewrite your accidental deletion.
You can toggle a switch that allows you to see what files or folders you’ve deleted and simply hit ‘Restore’ to put them back in action! This feature is perfect for ensuring you have that little bit of extra added security for your files in case anything goes wrong.
Backing Up Photos with an External Hard Drive
The first thing you want to purchase for your next trip is an external hard drive to do daily photo back ups. In the past the cost of hard drives, as well as the size and capacity, was extremely limiting. Now, thanks to technology, external hard drives for travel are extremely accessible.
After each day of shooting, spend five minutes dumping all your files onto an external hard drive. It not only frees up space on your camera memory card, but it gives you a backup copy. It’s also a great time to categorize your files and start to organize them into location, or photo or video.
We actually travel with three external hard drives, but we’re working as professional content creators, so it might be a little overkill for the average traveler. There are a lot of options, but we’ve found the WD My Passport to be a great choice. We create two copies of our photos on two different hard drives, making sure to copy directly from the card each time. That way if one hard drive goes down, we’ll always have a back up until we can upload them to Dropbox.
You might think that having an external hard drive is all you need for securing your files, but you really want to ensure you go that extra mile and back them up online. Just like memory cards, hard drives are fickle and can also get corrupted. You can also drop them, spill a drink on them or lose them.
They are handy for getting faster access to your pictures, especially if you don’t have Internet, but they won’t save your pictures from being lost forever! So along with backing up on an external hard drive, always be sure to back them up online and you’ll never have problems again!
Have you ever had back luck losing photos from your travels? Or do you have any other suggestions we can add to the post? Drop us a comment below!
“This is a sponsored post for Dropbox. All opinions are my own. Dropbox is not affiliated with nor endorses any other products or services mentioned.”
One of the biggest things holding back would-be travelers from taking the trip of a lifetime is…. (you guessed it!), money! For many people, it’s easier to go traveling when you’re just out of school and go backpacking for a few months. You’re happy to live the cheap hostel life and there are very few commitments keeping you back home. But as you get older, you tend to settle into life a bit more and start having real responsibilities. Things like your mortgage, car payment and other bills make it difficult to ditch your real life for an adventure, even for just a week or two.
Luckily, there is a way to not only keep paying your bills while you travel, but possibly make a little spending money as well – listing your place on Airbnb.
Most of you will be familiar with the Airbnb platform. Apart from being an incredibly useful service to find accommodation while traveling, they’re also a pioneer in founding and developing the sharing economy. Airbnb has helped create a safe and secure platform of hosts around the world, so you can always find accommodation that fits your budget. Whether it’s crashing on someone’s couch in the living room or renting your own private villa, Airbnb has it all. Airbnb has become so popular around the world, you can now stay in crazy accommodations like castles, tree houses, igloos and windmills.
Chances are you’ve been traveling recently, you’ve probably stayed in Airbnb at some point. And while most people probably look at it from the consumer end (booking rooms / houses) there is a WHOLE other element to Airbnb that a lot of people aren’t utilizing…. hosting!
For every room, house or apartment that you’ve been a Guest at with Airbnb, there’s a smart and savvy host behind the listing that has worked out a way to make money from their listing. These people are making an income, and many of them are traveling the world using this income.
Benefits of Hosting on Airbnb
Picture this. You’ve got a nice little apartment with your partner and you’re planning to go away on holiday for 2 weeks. You both love to travel, so this isn’t the first time you’ve ventured off on a holiday, whether it be for the weekend in the snow or a month long backpacking trip to Central America.
You’ve got a mortgage to pay, as well as the expenses of your trip, so money is tight. The whole time you’re traveling your beautiful house is going to sit there, accumulating bills, while you spend even more money on your trip. How can you avoid the financial pitfalls of traveling? Easy answer, list your apartment on Airbnb!
Since 2008, Airbnb has been perfecting a platform that helps travelers all over the world find affordable accommodation, and hosts create a flexible schedule to list their places exactly how they see fit. As a host, you control all aspects of your listing and can set it up to suit your life and lifestyle.
This is undoubtedly one of the best features of Airbnb for a host. You control your schedule and when you want to list your place, as well as how much you want to list it for, how long and whether there’s a minimum or maximum stay. You can choose to put it up on the weekend while you’re off on a short trip, or list it for months at a time. The flexibility of the program is by far the most appealing aspect for hosts.
And the beauty of hosting is that while you’re traveling, you’ll be making money! Not only does that help pay the bills back at home, but it also helps fund your travels while you’re off exploring the world. Wouldn’t it feel nice, as you’re kicking back with some margaritas poolside in Mexico, to know that your place back home is paying for the next round, as opposed to your savings account?
Better still, while you’re traveling you can use Airbnb to find accommodation as well, and then pay for it with the money you’re earning from Airbnb. What a satisfying feeling it would be to stay at someone else’s listing while you’re traveling, knowing that back home your place is paying for this stay. It’s about as meta as it gets in the travel tech space.
Who Can Be an Airbnb Host
Anyone who is looking for a little extra cash to help fund their next adventure and interested in opening up their home to the world! If you’ve got a spare room, house or apartment while you plan your next trip, you too could be an Airbnb host.
And while anyone can be an Airbnb host, that doesn’t mean Airbnb just open the flood gates and forget about standards. In the interest of providing a safe, secure and enjoyable experience for both host and guest, Airbnb does have a few community standards that hosts must adhere to. These aren’t intended to be restricting, but just to ensure a high level of hospitality and safety is provided to the guests. It’s not different than any expectations at a bed and breakfast or hotel.
Costs to List on Airbnb When Traveling
You may be wondering if there’s a monthly fee or any starting costs to posting your accommodation. Nope! Being a host doesn’t cost you anything! It’s absolutely free to sign up as a host on Airbnb and make a listing. Airbnb will only ever charge a small service fee (generally 3% of total booking) once a reservation has been made.
Is Hosting on Airbnb Safe
In a short answer, yes, very safe! Airbnb is not only a practical service, but they’ve got your back. Each guest that joins Airbnb is required to provide information that helps confirm their identity. All guests need to provide a verified phone number and email address, and if you want to be extra secure you can elect to have guests be ID verified and have recommendations from other hosts.
Think of it like a secure social networking site, where you have a profile and you can provide different levels of verification to prove who you are. Airbnb does the same, to make sure you know exactly who you’re dealing with when hosting. When you get contacted by a potential guest you can view their profile, see if they have any reviews and also see what level of verification they have. Only once you feel comfortable do you need to accept their inquiry.
Aside form Airbnb’s thorough verification process, they also offer protection in the very unlikely scenario that something happens to your place. As a host you’ll be covered by Airbnb’s $1M USD in property damage protection, as well as another $1M USD in accident insurance.
How to Get Started as an Airbnb Host
Becoming an Airbnb host is a super simple, streamlined process. It’s designed for you to worry less about the technical side, and more about the benefits of being able to rent your place while you’re away.
When creating your listing, you control how you want to host. With so many customizable features for Airbnb hosting, you can set up your listing exactly how it suits your lifestyle. Choose when your listing is available, what time check in / check out is, what the maximum / minimum amount of nights a guest can stay and more!
When it come to setting your price, Airbnb helps you along the way. With their Smart Pricing tool, Airbnb gives you assistance on what your listing price should be based on location, time of year, space available and amenities. Of course you can always choose to set your price exactly how you want, but this tool helps you get started.
Once you’ve started receiving some bookings, or when demands are higher, you might decide to bump up the price. Or if you’re having a slower month and want to entice more people, you can drop the prices a little.
You can also add a cleaning fee into your price, as well as discounts to encourage longer stays. If you’re traveling for a long time it might be easier to offer a weekly discount to entice people to stay longer than just a couple of days. Longer staying guests means less hassle while you’re off relaxing on a Caribbean beach.
It’s really that easy. You’re in control of how you host, how much you charge and when you want to host. Guests inquiring about your place can get in contact with you through Airbnb’s messaging service, which means you don’t need to disclose any personal information like your number or address until you’ve finalized a booking.
To get started listing your place and financing your own adventure,sign up here!
Recommended Trips to Take While Listing Your Place on Airbnb
So now you’re all set with your place listed on Airbnb, here are a couple of trip ideas to inspire your next adventure!
Northern Spain Road Trip
Rent a car and take off on your very own Northern Spain road trip adventure through rugged coastlines, mountains tops and delicious food and culture. Visit small Spanish villages in the countryside, where the adobe brick houses bake under the harsh afternoon sun, and the only way to cool down is with an ice cold beer or jug of sangria. Stop off in different towns along the way and live like locals do, wandering through the streets at night, stopping off for tapas and drinks at various bars along the way.
Bali
Swap your place back home for a beautiful villa, with its very own plunge pool that overlooks the lush green rice fields of Bali. Take in the smell of incense at the local temples, as you zoom past on a scooter and on to your next adventure. Eat delicious, $1 roadside nasi goreng and sip a cold beer to escape the humid evening heat. Or head across to the incredible Nusa Islands and explore the surf breaks, jagged coastlines and unique island culture.
Australia
Head Down Under, as you explore all the natural wonders that Australia has to offer. Whether you’re taking a road trip down the east coast, stopping off along the way to see all the amazing beaches, or posting up in a cute coffee shop in Melbourne and watching suburban life go by. Australia offers a range of different adventures or relaxing vacations for you to enjoy. Even if you’re from Australia, take advantage of renting out your place while you travel other parts of this beautiful country. As a fellow Aussie, I know you haven’t seen it all!
This post was created in partnership with Airbnb. For years we’ve been big supporters of Airbnb and have used it countless times throughout our travels. As always, we would never promote a product or service we didn’t personally use, trust and support.
Disclosure: This post has been written in collaboration with Trover. In 2019, Don’t Forget To Move became an official Trover ambassador and we couldn’t be more excited to share this amazing company with you. As always, all views and opinions are our own and we would never promote a product or service that we didn’t fully support, trust and use.
If you’ve been checking out our social feeds, you may have noticed that we keep referencing this thing called Trover. Some of you know what it is, many of you don’t. A few of you immediately went on and created a Trover account for yourselves because you figured it must be legit if we’re promoting it (you know who you are and we love you for it!). Whichever column you fall under, we wanted to hop on here to pull back to the curtain and answer the question – what is Trover?
In a nutshell, Trover is a travel photo sharing app and website. We know, we know. Who needs another social media account? In a world where we’re glued to our phones, is another social media network really necessary? Hear us out..
Trover is awesome because it’s 100% travel focused. That means when you go on to their app or website, you’ll only find travel related content. No more logging on to Instagram for travel inspo and then realizing you’ve spent the past 4 hours looking at meme accounts. Trover is all travel, all the time.
When posting photos, you can give descriptions, tips and exact locations for your uploads, allowing other users to visit your recommended locations. You can create lists of places you love and search other people’s lists to find nearby locations you never knew about. Trover is all about creating a community of travel-obsessed users who love sharing their favorite places with each other.
Here are some of our favorite features on the Trover app and website:
Discoveries
On Trover, your photo posts are called discoveries. Creating discoveries is super easy. You just upload your photo, geo-tag the location and create a description about the location. You then have the option to automatically share the photo on Facebook, Twitter or Tumblr. Once you’ve published you can also share the content on Pinterest, or send it via email. It’s all super easy.
Discoveries can be anything from your favorite white sand beach in Cambodia, the viewpoint from an incredible hike, or simply your favorite spot for a latte in the city. Whatever lights your fire around the world.
You can also search for other people’s discoveries by location or hashtags to find exactly the inspiration you’re looking for. Scroll through the feed, liking and commenting on your favorite discoveries to engage with your fellow Trover community member. Found some inspiration for your next adventure? Add them to a personalized List to curate your favorite content.
Lists
One of our favorite features of Trover is the ability to make lists. Personally, we tend to post photos out of chronological order, some from recent trips and others from years ago. Our feed can get jumbled with a mix of different trips and places, so being able to create lists dedicated to specific destinations is really helpful. Lists are basically a collection of any set of themed discoveries, whether they are your own photos, or photos from other Trover users.
For example, a user who wants to check out our Maldives content for their upcoming trip can just visit our Maldives list rather than have to scroll through our feed. There they’ll find all our favorite white sand and crystal clear water beaches shots in one!
And lists don’t always have to be destination based. If you go to Trover’s Explore section, you can see that they have featured lists like “Weekend Getaways USA” and “Ancient Ruins & Temples.” These lists are then separated by location. So if you want to find ancient ruins and temples in Cambodia, it’s easy to narrow the list down. You can also save other people’s photos to your list to create a personalized bucket list for future destinations! As you create your list, it will automatically update locations on the list’s map, which basically creates a ready made itinerary for you!
Maps
Since Trover is all about practicality, it makes sense that there’s a really functional map feature. When you add photos on your account, you can pinpoint their exact location. Your followers can then plan their itinerary around visiting your recommended places.
Every user has a world map on the top right corner of their feed that shows everywhere they’ve posted discoveries of. So if you’re really digging someone’s content, you can see where else they’ve been and keep getting travel inspiration from them!
Or map is dotted all over the world, so there are plenty of fun adventures to check out!
Nearby
Trover has a feature that allows you to find nearby destinations that have been tagged by other users. So if you’re off exploring for the day and want to find some nearby recommended spots, you can just hop on the “nearby” section and see what you can find.
Trover doesn’t curate the content by amount of likes, comments or other manipulated stats, they simply show you the closest photos from your exact geo-tag to give you an idea of what’s around.
This is also great if you’re in your hometown and want to have a spontaneous adventure. Sometimes it’s fun being a local and seeing your home through a traveler’s eyes! The app also tells you exactly how far the recommend places are.
Contests
Every month Trover hosts a contest around a different theme. An example of a theme in the past was “perspectives.” To enter, users simply upload a new discovery (must be a new photo!) and used the hashtag #Perspectives in the description. Trover chooses a winner every month to win a $1500 Expedia voucher! Pretty awesome prize just for uploading photos!
Trover also does a great job of featuring their favorite accounts. They have a few lists that they continuously update including What’s Hot, What’s New, Top Trovers and Discovery of the Day. You may just found yourself and your discoveries featured on one of these lists! This helps promote your account to other Trover users, and they can follow you to see future discoveries.
Why We Love Trover
Trover is a fun way to stay involved with the travel community even when your trip ends. As opposed to Instagram, where you might post shots of your travels and get comments like “pretty” or “so jealous!” Trover commenters are much more likely to ask for tips and recommendations. For travel addicts like us, sharing this information with people who will put it to good use keeps us excited about traveling even when we’re at home.
To be honest, we’ve recently been disillusioned with Instagram as a travel tool. At one point, we loved sharing shots from our travels and seeing other user’s recommended destinations. But the lines between fashion, lifestyle and travel are blurring on IG. Destinations are becoming a backdrop to the main focus of the newest trend of watches or a popular bikini line. And with the pressure of getting as much engagement as possible, it’s hard not to succumb to the trends. We’ve been guilty of following the herd to keep our likes up. And to be honest, we’re just sick of the “likes” rat race.
Trover bring us back to what social media was originally about – connecting with people all over the world who share your passion. We’re excited to continue using it to get in touch with people who love travel as much as we do! There’s less pressure to post “perfect” photos, or worry about posting too often or not often enough, or posting at the exact right time for your audience. With Trover you can share the places that you love around the world and engage with other users who will hopefully love them too!
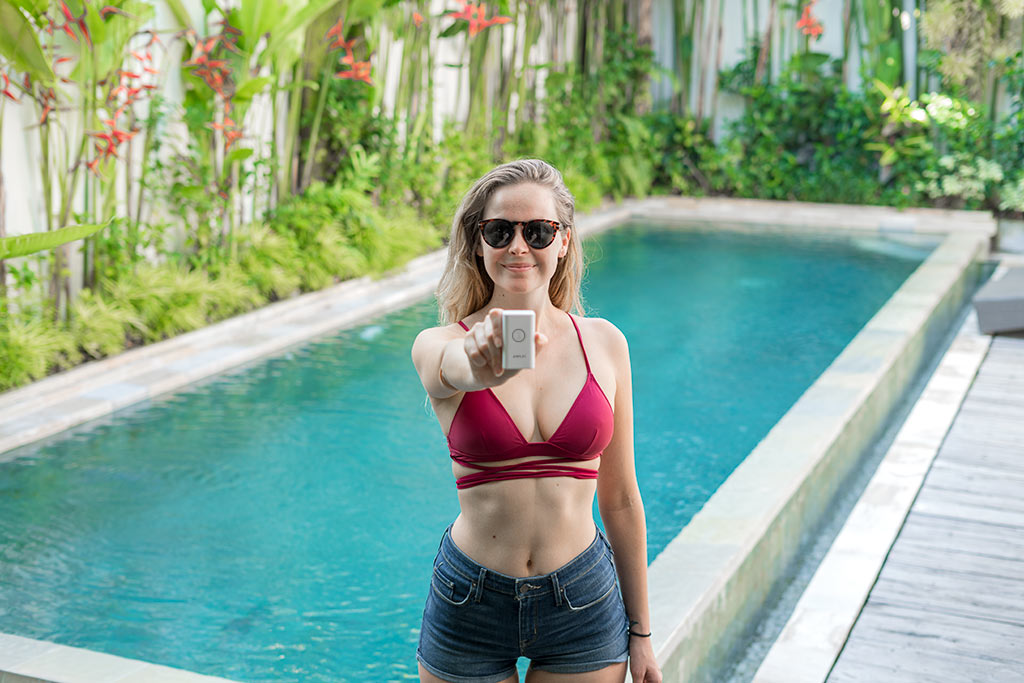
As full time travelers and bloggers we’re always looking for ways to make our online lives easier. Any new tools or devices that can make our business run smoother and faster means less time feeling frustrated in front of a computer and more time adventuring around! AmpliFi Home promised to do just that with their new travel tech device, the AmpliFi Teleport. When they first emailed us about participating in their AmpliFi Teleport Home Connect Challenge we were a little skeptical about how much this little device could really do. Well, we’ve been using the Teleport in Bali, Indonesia for about a week now and it’s a pretty incredible! Don’t let the size fool you, this little puppy has a lot of capabilities perfect for travelers and people working abroad.
The AmpliFi Teleport Home Connect Challenge
If you haven’t seen our blog post detailing our thoughts and anticipation before this challenge, you can check that our post about the importance of staying safe online while traveling. As a summary, the AmpliFi Teleport is a small device that plugs into a power outlet and allows you to connect to your home wifi network from anywhere in the world through a local wifi connection.
That means you can access files on your home server, create a secure network even on public wifi and go to websites that may be blocked because of your location. For such a robust device, the set up was surprisingly easy. That’s part of the charm of the AmpliFi Teleport. It’s not just for techies looking for a hardware VPN to connect to their mesh points (yea, who even knows what that means!). It’s for normal travelers and people, like us, who travel and work online.
After the initial set up, you really just need to plug in the device to a power outlet and you’re good to go! I mean there are a few more steps than that (see our detailed set up instructions below), but if my mum can set it up for us via a FaceTime call, you’ll be just fine!
Watch our video review of the AmpliFi Teleport + awesome shots from Bali, Indonesia
AmpliFi Teleport Outcome
Our challenge was to see how many different ways we could use Teleport to connect to our home network. Here’s what we found:
Accessing Files Remotely
One of the greatest features of Teleport that we definitely underestimated was accessing files on our home server. At home we have a network attached storage device, which is like a hard drive that connects to our home network. It’s filled with documents like old blog articles, photos from our travels, movies, music and more. Using Teleport we’re able to access these files as if they’re on our laptop. On a personal level, it’s amazing to be able to stream music and watch movies that we didn’t previously upload to our MacBooks or iPad.
Professionally, it’s made our lives so much easier because we can access important documents without having to load up our laptops before leaving for our trip. So if I need photos from a previous trip for a new blog post I’m writing, instead of being out of luck if I didn’t upload them, I can download them with ease using Teleport. If I want to continue working on some writing projects that I may have forgotten to put on my laptop, I can use my word processor on my laptop to continue writing and then save them back on our home network storage device. This is crazy useful for our travel blogging. It’s also perfect if you’ve forgotten an important document, like a copy of your passport or credit cards, so you’re able to access them in an emergency situation.
Online Security While Traveling
Online security is one of those things that you don’t realize how much you need it until it’s too late. We’ve been fortunate enough to not have had any incidents with online hackers, but it’s becoming more and more common. Because we travel so much, almost all of our online banking is done overseas using public wifi. That leaves us wide open to a security breach. With Teleport, using our home network means accessing a safe and private network. That means we never have to worry when we’re paying credit bills, shopping online or even making hotel reservations. We recently paid a credit card at a cafe in Bali and had no hesitation using the public wifi because we knew it was being re-routed back home using Teleport!
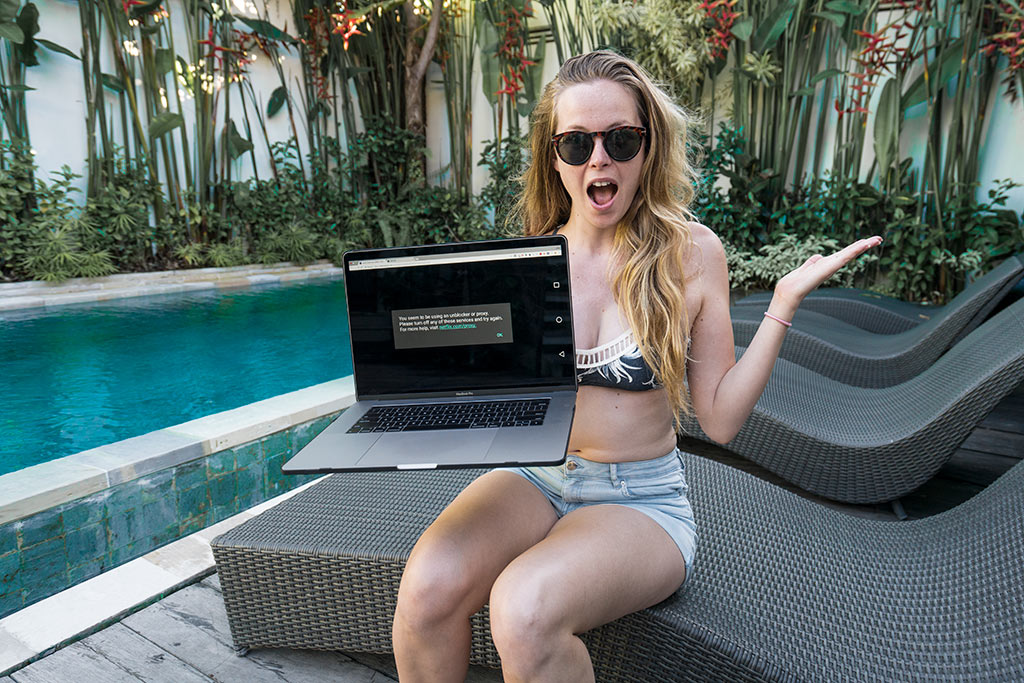
Yes we sometimes watch TV while we’re traveling. Sometimes after a full day of adventuring around beautiful Bali, we just want to relax with a binge-watching session of our favorite shows. So sue us! Unfortunately, most of our streaming networks are blocked in Indonesia. Yes, we can use a VPN, but plugging in our Teleport is an easier and more secure option. It’s as simple as connecting to our home network and voila! The computer thinks we’re in the United States, giving us access to all the streaming networks we have at home. We’ve been able to watch Netflix US, HBO Go and Xfinity, which our local cable provider. That means that we can stream important live events like the Olympics! Besides our favorite television streaming sites, there are other sites that are geo-blocked in Indonesia. Sites like Reddit and Vimeo are partially blocked, it seems to depend on the internet provider. Either way, having the Teleport ensures that we can access any site we’d be able to in the US.
Other Uses
The above were the features that most stood out to us, but the AmpliFi Teleport also has other functionalities. You can use the access to your home network to check your house security system or other smart home devices. You can video call with your friends and family back home easily. You can create profiles for your family members and schedule times to pause the internet so you can get quality family time. I’m sure more tech-savvy users can think of a ton of other ideas to utilize the access to their home network!
Setting up the Amplifi Teleport
The package comes with an AmpliFi Router to be kept at your home, an AmpliFi Teleport to keep with you when you travel, an AC adapter and 2 ethernet cables. An important thing to note is that the AmpliFi Teleport will only work with an AmpliFi brand router, so you need the full package. The first thing you need to do is download the AmpliFi app on your smartphone. Then connect your AmpliFi Router to your broadband modem using the ethernet cable.
Plug in your AmpliFi Router to a power outlet using the AC adapter. Go to the AmpliFi app on your smartphone and follow the instructions to configure your device. We actually had my mom set this up in California and even though she is (self-proclaimed) technologically challenged, it was a breeze. After those steps, you’ll be prompted to name your wireless network and create a password. Click save and continue, then you’ll see your newly named wireless network in your list of available networks. Connect to it and enter the password. Then you’re good to go!
The installation of the AmpliFi Teleport is equally as easy. Using your computer, phone or tablet at home, connect to the AmpliFi Router wireless network that you just created. Tap the Teleport icon and click Test Connectivity. Then plug your Teleport into a power outlet and watch as the LED light starts to flash with a full circle. Connect your computer or phone to the wireless network named Teleport XXXXXX (it will be a six digit combination of letters and numbers that are located on the device’s label).
A set up portal will open on your device and all you have to do is sign in and it will configure the wireless network you will use to access Teleport in the future. Select the network you want to access. A sign in portal should pop up so you can connect to the wireless network you have configured (or go to if it doesn’t open automatically). Using your mobile app, tap “Yes, pair this Teleport,” after verifying that its MAC address matches the code on the device label. Teleport should then connect to your home network. Double check that it worked by opening your web browser or check the Teleport’s status in the mobile app.
Phew, that was a mouthful! It may seem confusing written out, but once you’re going through the steps in the app, everything becomes clear. Trust us, it’s easy!
AmpliFi Teleport Review: Final Thoughts
After a week of taking the AmpliFi Teleport Home Connect Challenge, we can say with confidence that we’re big fans of the AmpliFi Teleport. As a traveler, being able to stream all of our home television channels is a dream. As a travel blogger, having access to our home files like photos and videos is super useful. We’re excited to keep using our AmpliFi Teleport and find new ways to use it abroad, as well as new countries! Here’s to making our travel work life easier, so we can spend less time on the computer, and more time enjoying these gorgeous destinations!
This was a sponsored challenge between Don’t Forget To Move and the team at AmpliFi. As always, all thoughts and opinions are our own.
As travel bloggers, so much of our lives revolve around being online. It has its pros and cons, but ultimately allows us to travel, build our business and live a life of freedom. It also means we’re always on the lookout for tech gadgets and tools that will make our life easier. So when AmpliFi contacted us about their new Teleport product, that will allow us to access our home internet and server, we were intrigued. When they told us we’d be able to connect to US Netflix overseas, we were sold!
Even for the tech-challenged (my name is Christine and I am technologically challenged), their product is easy to understand. It works like this: Say you’re in a foreign country and just want a quiet night in your hotel room to watch the new season of Stranger Things. Hey, no shame. You sign onto your Netflix account and whomp whomp, Netflix doesn’t run in the country you’re in! So now not only are you stuck watching TeleMundo 7, but you also run the risk of seeing spoilers.
Secure Internet Connecting While Traveling
Luckily, with the AmpliFi home router and new Teleport device you’re home free! The two products combined help provide a safe and easy way to access resources at home, even when you’re abroad. Using any Wi-Fi connection abroad, your Teleport creates an encrypted connection between you and your AmpliFi router at home, allowing you to access your home network wherever you go. When you’re abroad, simply plug in your Teleport device, connect with the AmpliFi router that you set up at home and you’re able to re-route to your home connection from the connection abroad. That means that your computer thinks you’re at home and you can load any site you’d normally be able to. Netflix travel movies binge, here you come!
Online Security for Travelers
But in all seriousness, AmpliFi boasts incredibly helpful features for anyone traveling abroad (not just TV junkies like us). Using a local WiFi network presents a variety of problems that AmpliFi aim to solve. Besides the frustration of not being able to watch your TV shows, you also run the risk of a security issue. Shared WiFi (even those that require a password) are prone to hackers. Anything like online banking, shopping or inputting private information is risky on a public WiFi network. Hackers are only getting smarter and more advanced unfortunately, so we have to be more diligent about keeping our information secure online.
You may be thinking that the AmpliFi Teleport product sounds like a VPN. And it’s definitely similar. A VPN (virtual private network) creates your own private network even if you’re using public WiFi. There are free ones and paid versions. Many people use them to download TV shows, so their internet provider can’t see it and bust ya for illegal downloading (or so I’ve heard…). It’s also common for people to try to use VPNs to watch programming that isn’t available in their country. Unfortunately, there’s a Netflix VPN block, meaning the guys and gals at Netflix have outsmarted most of the VPNs out there!
The best Netflix VPN workaround is to connect to your home device. Another problem with VPNs are that they can often slow down whatever you’re working on and, even more nerve-wracking, track what you’re doing online. This isn’t the case with all VPNs, but some “watch” which sites you’re going on and some even sell that data to third parties. Creeeeeepy. Using AmpliFi to connect to your home WiFi is the easiest way to ensure your safety online.
To showcase all the great features, AmpliFi has asked us to participate in their AmpliFi Teleport Home Connect Travel Challenge. We’re challenged to test how many different ways we can connect to home while we travel. We’ll also be detailing how to install the product and what we’ve found it most useful for. For now, we just want to chat about what we’re expecting from the challenge.
The Challenge
Over the course of a week it’s our challenge to see how many different ways we can use the AmpliFi Teleport to make our lives easier online. Here are some of our ideas:
Watch TV! – Over the next week we plan to try out the Teleport by logging into all of our at-home TV networks. I know, I know, it’s gonna be a lot of work. But we’re willing to do it so we can give you guys a fair review of the product! You’re welcome 🙂
We’ll be trying out Netflix, Hulu, Xfinity (our at home cable provider) and HBOGo. All of those are restricted in Indonesia, with the exception of Netflix. Netflix was recently allowed here, but not with all the great shows and movies you get in the US. That’s why we need the Teleport to unblock Netflix US. We’ll see how the device works with streaming video, in terms of speed and quality.
Access files at home – Another great feature of the Teleport is that we can access all of the files on our home server. For non-tech geeks, it’s a bit like being able to use our desktop at home through our laptop abroad. We can access our documents, photos, videos, music and movies that we have at home. This will be super useful to us because we often need to access old photos and video to include in our blog posts. It would be great to be able to grab a movie that we forgot to put on our laptops. We’re not sure exactly how this works, so we’re looking forward to trying it out!
Banking security – Because of our travels and our remote business we do almost all of our banking online (also, who goes into a bank anymore?) We’ll admit, sometimes we’re not the most careful with where/how we log into our accounts. Hopefully using the Teleport will give us some peace of mind that all of our information is secure.
Aside from these main features, we’ll be looking at the ease of setting up and using the device. We’ll be on the lookout for any other uses that we didn’t anticipate and how other travelers might use the product. We’re very excited to try out the AmpliFi Teleport here in Bali and can’t wait to share with our readers!
This is a sponsored challenge between Don’t Forget To Move and the team at AmpliFi. As always, all thoughts and opinions are our own.