A Great Ocean Road Backpackers Guide: Lorne to Port Fairy

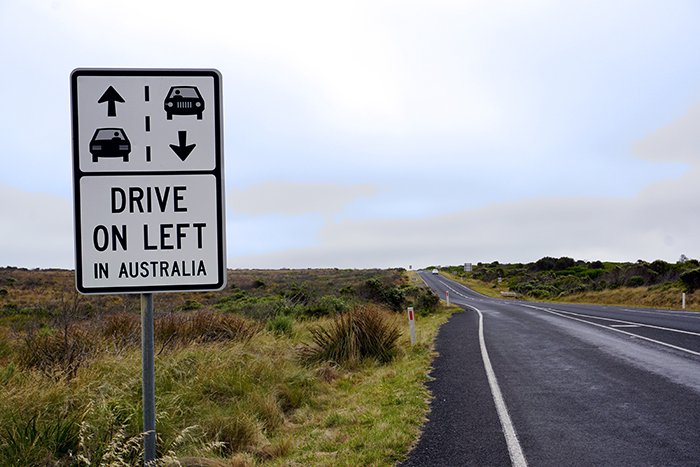
If you’re heading down to Melbourne on your travels around Australia, the Great Ocean Road is inevitably on your itinerary, and rightly so. This gorgeous coastal drive is quintessential Australia. During our two-day trip, we swam in beautiful beaches, got up close to native wildlife and ate our own weight in delicious local produce. We enjoyed our trip so much we couldn’t squeeze it all in one post. So here’s a Great Ocean Road Backpacking Guide Part Two: Lorne to Port Fairy! If you missed Part 1: Melbourne to Lorne you can check it out here.

Apollo Bay

Another town like Lorne, Apollo Bay is a good place to stop by for lunch or a snack. And just like Lorne is has an array of souvenir shops, nice beaches and waterfall hikes. To be honest I’ve never really spent much time in Apollo Bay, as I’ve always just opted to pass right through after stopping previously in Lorne. I mean it looks great, and I’m sure it’s really nice, but by this stage all you really want to do is hit the other spots before the bus loads of tourists roll up.

Great Otway National Park

After Apollo Bay you’ll need to cut inland to bypass Cape Otway. Follow the windy road that splits the trees and be sure to take a detour into the National Park via Otway Lighthouse Rd. As you make your way through the park don’t forget to look up. This area is famous for koalas just leisurely chilling in the trees that border the road. Check for other cars pulled up by the side of the road that have spotted them, or keep your eyes peeled.

At the end of the road you’ll hit the Cape Otway Lightstation, which is Australia’s oldest operating mainland lighthouse. It’s been trying to steer ships clear since 1848, and while its done a top job, there are also many unfortunte stories of loss along south-west Victoria’s treacherous shipwreck coast. Experience the full ordeal by taking a tour of the lighthouse and surrounding areas to learn about the history.


 “We were unlickly greeted by a huge Tiger snake, one of Australia’s most deadly!”

The Rocks

Ah yes, the rocks! What everyone came down to see. Don’t be mistaken by thinking that the 12 Apostles are the only delight along the way. Before you get to the main attraction be sure to stop at Gibson Steps, just outside of Princetown. These steps are believed to have been first carved into the cliff face by the original Kirrae Whurrong inhabitants, and since that time were maintained by the early settler Hugh Gibson who would use the access route. After descending down the path, you’ll find yourself on the foot of a wide, serene beach. Many people skip this stop, eager to get to the 12 Apostles, but it’s definitely worth your time. We had the beach almost entirely to ourselves and enjoyed the peaceful calm of the landscape.

Just a few minutes down the road are the car park and visitor centre for the 12 Apostles. There are a couple of different viewing platforms to take in these natural beauties and marvel at their creation. The 12 Apostles are a series of limestone rock formations that have been eroded by centuries of relentless power from the ocean. As an Aussie I might be slightly biased here, but they are absolutely amazing! Well worth the trip down!

There are a couple of tracks that take you to different view points, so be sure to follow them all. And while the path is well constructed and maintained, but don’t be fooled by the presentation, you’re still in the wild. As we were walking back to the car park we were unluckily greeted by a huge tiger snake, one of Australia’s most deadly. It popped its head out of the shrubs on the side and slithered across the path, chilled for a while as a crowded gather, and then took off into the bushes. Despite my calls to stay back and be careful a group of foolhardy tourists chased after it, as a mother almost pushed her pram over it. Seriously, if you see one, stay back!

After the 12 Apostles there are also the sensational rock formations of Loch Ard Gorge, London Bridge, Mutton Island and The Grotto. All with their unique story of either shipwrecks, native wildlife inhabitants or formation.


Port Campbell / Peterborough / Warrnambool

Each town a little bigger than the last. There are some places to sleep, eat and a couple of things to see, but nothing major. Take a little drive around to see what the quieter side of Victoria looks like compared to the hustle and bustle of Melbourne. If you want a decent, but greasy, meal check the appropriately named Frying Nemo at the Port Campbell petrol station to get your fish and chips fix. Well priced and sure to fill your stomach.

South Warrnambool has a surprisingly beautiful beach for a cool down if the sun is out in the afternoon.

 “Take a walk though the trails to spy native Australia animals going about their daily business.”
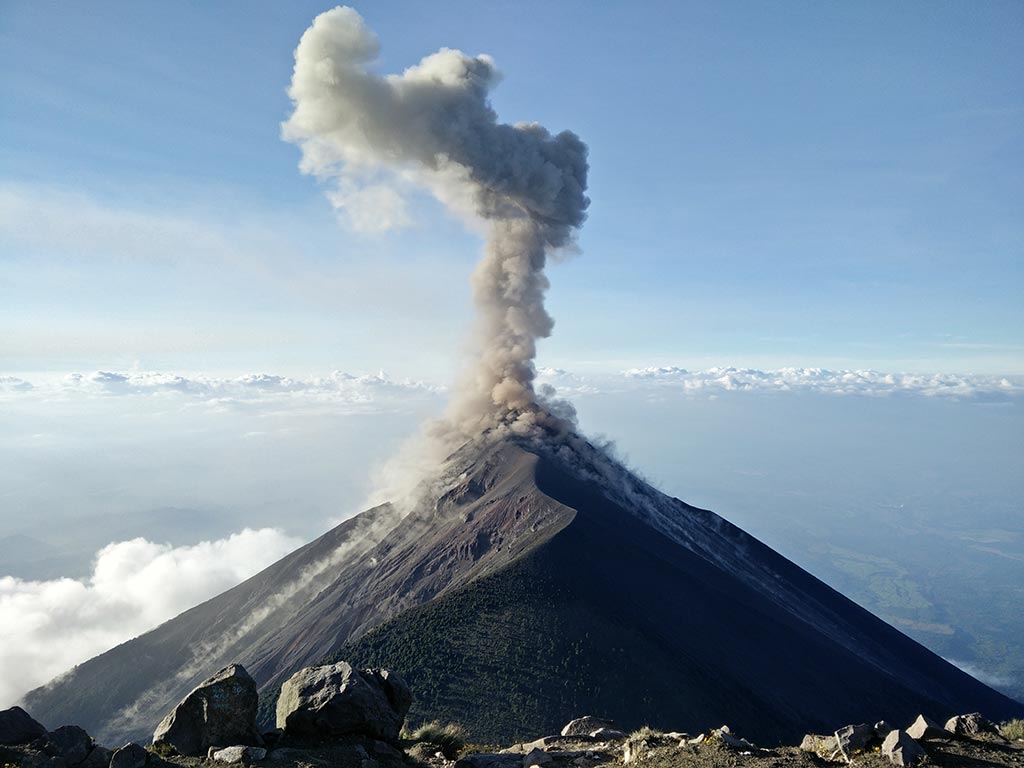
Tower Hill Reserve

Just 10 minutes out of Warrnambool is an awesome little location of natural wildlife and wonder. The reserve is set around an ancient volcanic crater and has grown up around the natural lake that formed in the middle. Drive in one way and follow the road that snakes its way through the reserve. Stop in the little parking bays and take a walk through the trails to spy native Australian animals going about their daily business. Dawn and dusk are generally the best times to catch the animals, but kangaroos can usually be seen round the clock. We recommend taking a picnic lunch or dinner to compliment the scenic sights and kick back in nature, it’s pretty awesome.


Port Fairy

Last on the Great Ocean Road Backpackers Guide is the quaint little town of Port Fairy. Established during early 19th Century this town has come a long way, but it has also made a really good effort to stick to its roots. There’s a couple of fun things to see in the area including Battery Hill, an old fort, and a beautiful port full of fishing ships.

If you’re looking for a drink to unwind from a big day of driving, swing into The Caledonian Inn and have a beer at Victoria’s oldest continually licensed hotel. It first started serving in 1844, and has been going strong ever since.

By now you should have a pretty good starting point to explore the amazing sights and places of the Great Ocean Road. There are loads more things to do, but we reckon this should keep you busy for a couple of days. The more time you’re able to spend at each spot the more you’re going to get out of them, so try not to skip past just for the sake of a photo. If you’re short on time pick the things that appeal to you and really enjoy them. If you miss something, so be it! It always gives you a reason to come back again!

Missed the first part? Come check out A Great Ocean Road Backpackers Guide: Melbourne to Lorne!

 What are you most excited to see down the famous Great Ocean Road? Drop us a comment below or find us on Facebook and Twitter!

A Great Ocean Road Backpackers Guide: Melbourne to Lorne

No trip to Melbourne is complete without a trip down Southwest Victoria’s famous Great Ocean Road. Famed for its iconic coastal rock formations, superb surf spots, chilled out locals and exotic wildlife, the Great Ocean Road is a must see destination for all travelers visiting Melbourne. And with our Great Ocean Road Backpackers Guide we’ll make sure you don’t miss a moment along the way.


Many tour companies run day trips out of Melbourne, but they’re often rushed and miss the finer details that make this road trip so incredible. Instead of paying someone to take you on a crowded tourist bus we suggest rounding up a couple of extra backpackers to split a rental car in Melbourne. This way you’ll have the freedom of exploring all the spots along the way without the horde of tourists that make the trip down daily. And judging from the number of Wicked Campervans and Juicy Rentals we saw packed with backpackers along the way, this is a popular sentiment.

Beginning is easy. Start in Melbourne, head west on the Princes Fwy for an hour and make your first pit stop in…


Torquay

Famous for everything to do with surfing. Home of the major surfing label Rip Curl, the quintessential surf spot of Bells Beach and legendary surfboard shaper Maurice Cole, among many other things.

Torquay is the perfect spot to start your Great Ocean Road road trip! Browse the outlet stores for a bargain from some of the biggest surf brands in the world, or pick up a second hand surfboard to try your luck at the waves.

It’s also where my folks live. And because I’m now an international nomad there’s always a free bed in my room. So hit them up! (Sorry mum). Otherwise the foreshore caravan park is a great central spot to stay if you want to have a crack at the waves. Don’t worry if you’re a beginner, Torquay also offers some of the best surf schools in Australia.


Bells Beach

This beach is technically in Torquay’s neighbor, Jan Juc, and it’s by far one of the most well known surfing spots not only in Australia, but also the world. Every year thousands of people make the trip down to Torquay over Easter to witness the surfing greats battle it out at the Rip Curl Pro. For the experienced surfers there are some amazing waves working all through this area. If Bells is busy try some of its neighbors in Winki-Pop, Centreside or Southside.

* Disclaimer * – To many tourists disappointment (and believe me I’ve been asked a number of times) this is not the final resting place of Bodhi from Point Break after the 50 year storm hit. The shooting of the classic Bells Beach scene was taken in none other than Oregon, USA.


Anglesea

Just 15 minutes down the road from Torquay is the quieter coastal town of Anglesea. It might not have the big surf shops and glamour of Torquay, but don’t underestimate this little town. Take a walk around the main street and sample some of the awesome food on offer. Although I’m now a vegetarian Jum’s Chicken Shop has been a favorite of mine since I was about ten years old. Hit up the chips and gravy for a real treat!

Another great activity is to take a drive up Noble St to the Anglesea Golf Course. On a nice quiet day you can spot kangaroos just lounging in the sun and kicking back on the gold course. Hop the fence and take a little walk around the course to see how close you can get to grab a few snaps.


Aireys Inlet

Another 10 minutes down the road you’ll come across Aireys Inlet. It’s even smaller than Anglesea, but has a pretty cool tourist attraction in the Spilt Point Lighthouse. Park at the base of the lighthouse and take a walk up to the point of the inlet. You can get some wicked views of the coast and even take a tour of the lighthouse. Prices start at $12 and go for about 45mins. From the top of the lighthouse you’ll get some sweet panoramic shots of the coast.

For all the Aussie readers, and possibly others around the world. This is also the lighthouse made famous by the popular early 90s children’s show Round the Twist. Be sure to take a picture in front of the lighthouse while singing the tune ‘have you ever… ever felt like this? When strange things happen, are you going round the twist?’


Lorne

Another 25mins or so along the curving Great Ocean Road and you’ll be in Lorne. Lorne is worth a stop to walk its main strip lined with outdoor cafes and shops selling kitschy beach souvenirs. There’s plenty of great roadside cut offs to take pictures, and observe the local scenery. Head towards Erskine Falls for a perfect opportunity to park the car, take a walk and stretch the legs. The trail isn’t particularly strenuous and you can cool off in the falls if it’s hot out. There’s also a range of other hikes and trails for those wanting to get deeper in the wild.

After the waterfalls take a stroll down the Lorne pier. At the end you’ll catch a cracking view, as well as a bunch of fisherman trying to catch some dinner. Check the huge sting-rays hanging around looking for a free feed. If you’re there during the evening, grab a spot on one of the benches and enjoy a stunning sunset.


With enough adorable beach towns and scenic coastal views to last for ages, it’s pretty hard to condense all of the Great Ocean Road into just one article. That’s why we’ve written another!


If you’re heading to the 12 Apostles and you want to see koalas and kangaroos in the wild for free, be sure check out our Great Ocean Road Backpackers Guide: Lorne to Port Fairy to see all the unmissable spots along the way.

Road Routes: El Tunco to El Cuco Bus

*** Updated October 2015 *** Just had a recent email from some backpackers traveling in El Salvador who confirmed that this route is still active and works well. If you’re taking the trip please continue to leave comments if anything changes. Gracias!

Getting from one cruisey beach in El Salvador to another shouldn’t be a hard task. That’s why we’ve mapped out the best way for you to take an El Tunco to El Cuco bus without any hassles and big spending. Discovering this trip was a bit of a mission, but we made it in the end, and this is how we did it. If the beaches of El Salvador are calling, then this is the trip for you!


El Tunco to La Libertad

Try to get over the early morning hangover and get out of El Tunco by 9am. Walk up to the highway and grab a #80 bus back towards La Libertad. 20Mins – 25c


 La Libertad bus to Comalapa

Catch the #187 bus (double check with the #186 as well) from out the front of the big wooden ship on the main beach road. You’ll ride along the Highway 2 until you hit the intersection with Highway 5 coming down from San Salvador. Not sure how frequently they come, but we waited about 20mins. Better frequency in the mornings. 1hr – 60c


Highway Intersection

Ask the driver to get off ‘a el puente por la carratera numero cinco’ (at the bridge for highway number 5). Get off before going over the bridge, which crosses Hwy 5, and follow the path that leads underneath it.


Under the Bridge

Time to head under a bridge in the middle of nowhere in El Salvador. This sounds like the sketchy part, but don’t worry. It’s tried, tested and came out clean. Once you walk underneath you’ll find it full of people waiting to make connections and busy street food vendors, all eager to help assist you.


Highway 5 to El Delirio

Wait to flag down a bus headed towards San Miguel. You don’t need to go that far, so be sure to tell the driver you’re only going to El Delirio. You’ve now done all the hard work; just make sure you don’t miss your stop. If you go too far don’t worry, you’ll end up in San Miguel and just have to trek your way back. 2 hours – $3.00


El Delirio to El Cuco

Get off at the roundabout and turn right. Once around the corner you wait to flag down a bus headed towards El Cuco beach. You’ll pass through the town of Chirilagua (where the only ATM is if you haven’t taken out money yet), and then onto El Cuco.


Getting to El Cuco Beach

Once you arrive in the center you have a few options. You can head west to Flores, renowned surf spot among locals and travelers alike, or head east to the beautiful beach El Esteron and stay at the gorgeous hotel/backpackers La Tortuga Verde.


Enjoy the beach of El Cuco

If you need any more convincing about beautiful beaches in El Salvador why not check out these posts on the beaches of El Salvador or the El Tunco vs. El Cuco article to find out which beach is best for you.


Going from El Salvador to Nicaragua?

If you’re headed to Nicaragua after the beach be sure to follow our El Salvador to Nicaragua bus for the cheapest transport in all of Central America.


Travel Tip

Speak to locals about where you’re going. Bus attendants aren’t always the most reliable in letting you know when it’s your stop. Locals are always happy to help out and shout out when it’s your time to get off. We have even experienced locals yelling at bus drivers for not telling us our stop. Now that’s commitment!


Road Routes: El Salvador to Nicaragua Bus

** Updated October 2015 ** Despite this article being a couple of years old, we still receive regular feedback from travelers that this is still the best and cheapest way to do the border crossing from El Salvador to Nicaragua. Please continue to leave comments if anything changes. Gracias!

Need a quick and cheap way to travel to Nicaragua? Looking for an El Salvador to Nicaragua bus? You don’t need to book a Tica bus or with a tour agency, local travel is the only way to go. It’s an easy trip that costs $13 and takes between 10-12 hours, so try to leave early and avoid crossing borders in the dark and missing your last bus at 5:30pm.

Here’s a great step-by-step guide that will ensure more money in your pocket and less in the hands of over-priced tour companies and buses.


San Salvador to el Terminal Oriente

First make your way to the main bus terminal in town. If you’re staying at Cumbres de Volcan it’s super simple. Walk to the corner, flag down the #52 and ride it till the end. Otherwise a lot of other public buses head there from the crack of dawn. 30Mins – 20c


El terminal oriente to Santa Rosa de Lima

Traveling in El Salvador is pretty easy to organize. At the terminal buses to Honduras run more frequently in the morning and surprisingly aren’t chicken buses, which makes the journey a lot more enjoyable. The express bus, which seems to stop frequently anyway, costs $6 and takes 3 hours. While the routine bus costs $4 and takes a little longer. 3 to 4 hours – $4/$6


Santa Rosa de Lima to the Honduran border

Once you get off the bus you can connect straight onto the public bus #330 which takes you within walking distance to the border. Don’t listen to the taxi-drivers who tell you journey is too far. 20Mins – 90c


Leaving El Salvador at the Border

Walk to the El Salvador immigration and disregard the peddle tricycles. Once again they’ll tell you it’s too far to walk, but it’s not. It’s a refreshingly easy walk after hours on a bus and only takes a few minutes. They’ll be plenty of people out and about so no need to worry.


Crossing the Border into Honduras

Yep you need to pass through a whole country just to get to Nicaragua. Honduras immigration officials take a handy $3, even though you’ll only be in the country for 2 hours. It’s a simple process and they’re pretty used to tourists crossing the border. On the other side you’ll find a lot of transport options ready to jet you across Honduras to Nicaragua.


El Amatillo to Guasaule

Straight through from border of Honduras to the border of Nicaragua. In Honduras the official currency is the Limpiera, but you’ll be able to pay in USD if you’re only passing through and don’t want to exchange money at rip-off rates. You’ll find a shuttle leaving just past the border that’s quick and breezy. 2 hours – $6


Honduras to Nicaragua Border Crossing

Exiting Honduras is easy, but entering Nicaragua may come as a surprise to your wallet. Be prepared to pay $12USD! Old guide books will tell you it’s just a US thing, but they were unfortunately outdated. There is an ATM at the border and you can pay in USD or the official Nicaraguan currency Corbodas. You won’t get a stamp because you’re still in the C4 region and they’ll continue to count from your initial 90 days when you first entered the C4 region.


Guasaule to León

Walk a couple of hundred feet past the border and ask people for the buses to León. The last one leaves just after 5:30pm, so make sure you get there in time. The last thing you want is an expensive taxi ride or being stranded at a dodgy border. 2 1/2Hrs – 50 Cordoba – $2


León Bus Station to Town

Once at the bus terminal in León you’re a little out of the main hostel centre. It’s walkable, but if it’s dark save yourself the potential hassle and get a taxi. Nicaragua is generally pretty safe, but you are exposing yourself to risk anytime you travel, so just have your wits about you. If it doesn’t feel right, don’t do it! $1 per person.


Enjoy the Activities

There’s a host of places to stay and activities to do! While we were there we took a tour of the famous Flor de Caña rum factory, surprised Christine with some salsa classes for her birthday and also volcano boarded down the famous Cerro Negro.


Moving On

Looking for the next location? Why not head to the our favorite beach location in the Caribbean, the amazing Corns Islands. Or perhaps you’re a hiker and want to tackle the impressive lake volcanoes of Ometepe Island!


Did this article help? Please let jus know, we love hearing your stories! Drop us a comment below or find us on Facebook and Twitter

Guatemala to El Salvador Bus (Updated 2021)

Updated in 2021! Recently we reached out to friends backpacking in El Salvador to confirm that this journey is still up to date and running. And it is! We always want to provide current information, so if you’re taking the trip please continue to leave comments if anything changes. Gracias!


Traveling to El Salvador? Looking for a Guatemala to El Salvador bus that’s cheap? Here’s the perfect solution! Find out how to do it for $10 instead of $30. Cheap, authentic and adventure all rolled into one, and at a third of the price.

When you start off chances are you’re departing from Lago Atitlan, because it’s amazing, a central location and everybody stops past it. You don’t want to pay $30 to take a shuttle, we don’t blame you, every dollar counts when you’re backpacking! If you wanna get to El Salvador on the cheap there’s no need to head back to Antigua to find a connection, or even brave Guatemala City for buses. Follow this easy step by step guide and you’ll be eating delicious El Salvadorian pupusas in no time. Also, if you need an El Salvador to Guatemala bus, just reverse the steps. It’s that easy.


Click on the photos to find more helpful El Salvador travel articles!


San Pedro, Lago Atitlan to Cocales

From San Pedro in Lago Atitlan it’s an early start. You”ll need to leave at 5am from up at the central Catholic church. It’s still dark when you get up there, but the market people are already starting to set up, so it’s safe to walk around. Grab a couple of things for the breakfast trip. 1Hr – 10Quetzales – $1.25


Cocales to Escuintla

In Cocales the bus drops you off at the change over intersection, so you won’t need to lug your bags around too far. Just make sure you tell the driver where you want to go. At the intersection there are also some cheap meals (15-20Q) on the side of the highway if you want a bit more of a breakfast. 2Hrs – 20Q – $2.50


Escuintla, Guatemala to the El Salvador Border (la frontera de El Salvador)

This bus will literally take you to the border of El Salvador. Esquintla isn’t the safest place, so don’t go wandering off. The transfer is really close, despite what the taxi drivers will tell you, so just ask a police officer or an elderly for some advice, they’re usually pretty trusting. 2Hrs – 40Q – $4.50


Walk to the El Salvador Border Crossing

Get off at the small border town, walk across and disregard the peddle tricycles that tell you it’s too far to walk. There’s something rustic and authentic about crossing a foreign border by foot, be sure to enjoy it.


Entry into El Salvador from Guatemala

This will be swift. You won’t get an entry stamp (sorry passport), and they’ll just let you in based on how many days you have left from your last C4 entry stamp. 30Mins – Free


Welcome to El Salvador!

First point of call, lunch. If it’s your first time in the country be sure to stop for some pupusas. They’re a national dish and absolutely delicious. Cheese, beans, meat or a combination of all stuffed into a ball of corn masa, flattened out and then fried on a hot plate. Served with a shredded cabbage side and hot sauce. At 35c a pop you can’t go wrong. Grab a few and kick back for half an hour. 30Mins – $1 for 3 (El Sal uses American dollars in case you’re not aware).


El Salvador Border to Sonsonate or Acajutla

Walk a few minutes past the border and you’ll hit a local chicken bus depot. Don’t hang out there for too long, as you always seem to find the dodgiest looking characters at the border. 90c will get you to Sonsonate. If you’re headed to La Libertad you can try and get a bus to Acajutla for around 70-80c, then find a connection. If you’re going to Sonsonate you can easily organise buses to Juaya, Santa Ana or San Salvador. 1 1/2hr – 90c


Sonsonate to Juayua

For us it was off to Juayua, just in time for their famous food festival that happens every weekend. This festival should not be missed if you’re in the area! Prepare to stuff your face full of delicious El Salvadorian food, which you don’t hear a lot about, but is really really good. 1Hr – 50c


Other Things to Do in El Salvador

The country is well known for the famous surf beaches, but El Salvador beaches are also top quality. Check out this El Tunco vs. El Cuco write up to see a couple of the best beaches in El Salvador on offer, or maybe just a beautiful photo gallery of the beaches, to help convince you more!

Other activities in El Salvador include the bustling capital San Salvador for the perfect combination of history, culture and relaxation, or taking a hike up Santa Ana, the highest and most active volcano in El Salvador to see the turquoise crater lake.

So there you have it. Skip the $30 shuttle to El Salvador and take a cheaper route and more exciting one. San Pedro will feel like a world away after 8 1/2 hours of travel (with waiting time it’s probably more like 10-11 hours) and you’ll spend less than $10. That means an extra $20 towards some hard earned beers!


Exit mobile version